This post may contain affiliate links. Please read our disclosure policy.
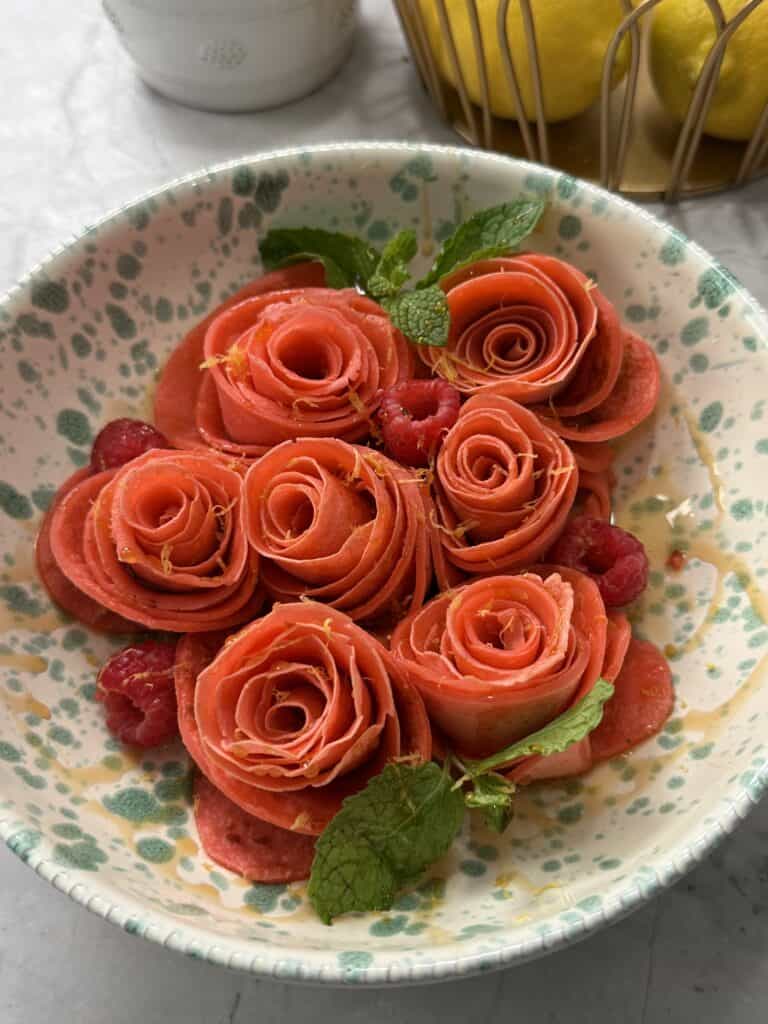
These Rose Crepes look complicated, but I promise they’re very doable. They’re thin, lightly vanilla-scented, and the perfect breakfast for your Valentine. There’s something grounding about spreading the batter, flipping at the right moment, then turning the delicate crepe into a rose. It’s calm, creative, and honestly kind of fun.
❤️ Why You’ll Love Rose Crepes
There are so many reasons to adore Rose Crepes. First of all, they look like they came straight out of a fairy-tale cookbook, yet they are incredibly easy to make with pantry staples. The crepes themselves are thin and silky with just a hint of sweetness and vanilla. The finished roses make any plate feel special, and the combination of tart berries, fresh mint, and sweet maple syrup adds a burst of flavor that balances the tender crepes.
🍲 Ingredients
I love that Rose Crepes rely on everyday ingredients and a few fun touches to make them feel special. Here is what makes them shine:
🥛 Milk, eggs and melted butter create a rich, tender batter that cooks up into thin, flexible crepes.
🍬 A bit of granulated sugar and a splash of vanilla add just enough sweetness and warmth without turning the crepes into dessert.
🥤 A pinch of salt balances the flavors and keeps the batter from tasting flat.
🌾 All-purpose flour gives structure to the crepes while keeping them delicate.
🌸 A few drops of natural red food coloring lend the crepes their rosy hue, making the final dish look like a bouquet.
🍓 Raspberries, fresh mint and lemon zest brighten each bite with tartness and freshness, while maple syrup drizzled on top adds a caramel-like sweetness.

👩🍳 How to Make Rose Crepes
To make these Rose Crepes, start by blending all of your crepe ingredients (milk, eggs, melted butter, sugar, vanilla, salt, flour and a few drops of red food coloring) in a blender until smooth. This should take about fifteen to twenty seconds, and it is one of my favorite parts because it feels like magic watching the batter turn a pretty shade of pink.
Heat a non-stick pan over medium heat and pour a quarter cup of batter into the center. Immediately tilt and swirl the pan so the batter spreads into a six-inch circle. Do not stress about making it perfect; rustic edges give the roses personality. Cook the crepe for about a minute until the bottom is lightly set, then flip it and cook for another minute. Repeat with the remaining batter, stacking the finished crepes on a plate.

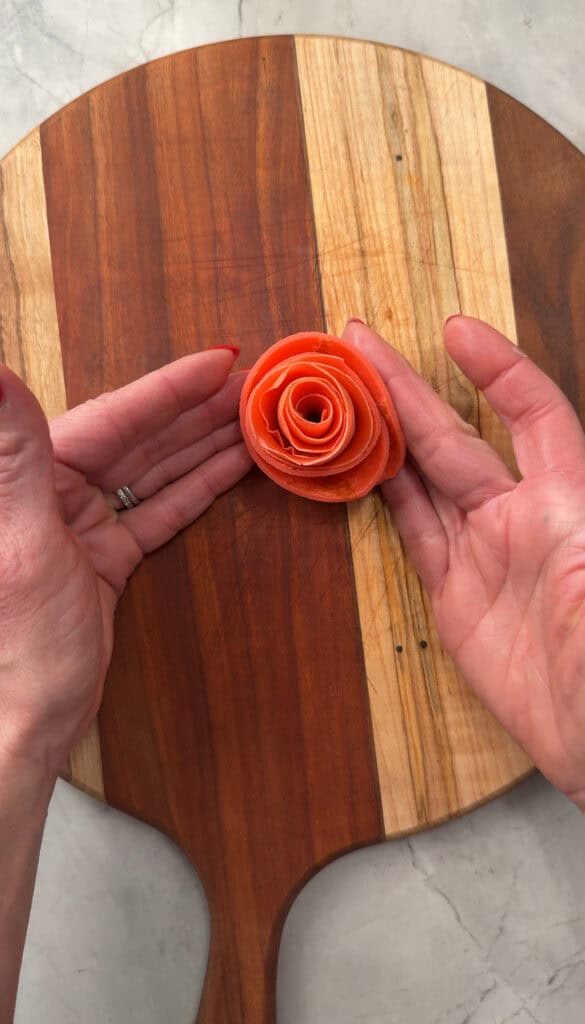
Once the crepes have cooled slightly, lay one flat. Using a small paring knife, make a shallow cut just inside the edge and slice in a continuous spiral toward the center, keeping the ribbon evenly spaced. When you reach the center, you will have a long strip still attached at one point. Starting from the outer edge, gently lift and roll the spiral toward the center, letting the layers fan out like petals. Repeat with all of your crepes until you have a bouquet of edible roses. Arrange them upright on a serving plate and garnish with raspberries, mint leaves, lemon zest, and a drizzle of maple syrup. Step back and admire your handiwork before everyone devours them.
🪄 Tips and Tricks
- Blend the batter ahead of time and let it rest in the fridge for at least thirty minutes; this relaxes the gluten and makes the crepes more tender.
- If the first crepe looks a little pale or thick, adjust the heat or add a splash of milk to thin the batter. The first one is often the tester.
🗒 Variations & Substitutions
- Swap the natural red food coloring for beet powder or freeze-dried raspberry powder for a more natural tint and subtle fruity flavor.
- Add a splash of rose water or orange blossom water to the batter for an aromatic twist.
- Use coconut milk instead of dairy milk and coconut oil instead of butter to make the crepes dairy-free. Fill the roses with lemon curd, mascarpone or whipped cream before rolling for a richer treat. Garnish with any berries you love—strawberries, blueberries or blackberries all pair beautifully.
How to Store Leftovers
If you have leftover Rose Crepes, store the rolled roses in an airtight container in the refrigerator for up to two days. Lay them gently so the petals do not get crushed, and keep any garnishes separate to avoid sogginess.
You May Also Like
🤔 Common Questions
Can I make Rose Crepes ahead of time?
Yes. You can cook and stack the crepes with parchment paper in between each, then cover and refrigerate them for up to a day. Assemble the roses and garnish just before serving.
Do I need a special pan?
A standard non-stick skillet works perfectly, but if you have a dedicated crepe pan, that’s even better. The key is a smooth surface for easy flipping.
Can I freeze the crepes?
Plain crepes freeze well. Layer them between sheets of parchment, wrap tightly and freeze for up to a month. Thaw in the fridge, then cut and roll into roses when ready.

Rose Crepes
Equipment
- 1 Non Stick Pan
Ingredients
Crepe Ingredients:
- 1¼ cups milk
- 2 eggs
- 3 tbsp unsalted butter, melted
- 1½ tbsp granulated sugar
- Splash of vanilla
- Pinch of Kosher salt
- 1 cup all-purpose flour
- A few drops of natural red food coloring
Garnishes:
- 5 Raspberries
- Mint
- Lemon zest
- 2 tbsp Maple syrup
Instructions
- Add all of the crepe ingredients to a blender and blend for 15 to 20 seconds, or until the batter is smooth.
- Grab a non-toxic non-stick pan and warm it over medium heat. Add ¼ cup of the batter to the center of the pan and immediately start moving it to spread the crepe into a 6-inch circle. It does not have to look perfect.
- Cook the crepes for about 1 minute, flip, and cook for 1 minute more, then remove from the heat and repeat with the rest of the batter.
- Place the cooked crepe flat on your work surface with the prettiest side facing up. Using a small paring knife, make a shallow cut just inside the edge of the crepe and begin cutting in a spiral toward the center, keeping the cut continuous and evenly spaced. Continue spiraling until you reach the center, creating a long ribbon-like strip still attached at one point.
- Starting at the outer edge, gently lift and roll the spiral toward the center so the cuts layer on top of each other.
- As you roll, let the slits fan outward slightly — this forms the “petals.” Repeat for all the crepes.
- Place the finished flowers upright on your serving plate. Garnish with mint, berries, and maple syrup.
Nutrition
Nutrition information is automatically calculated, so should only be used as an approximation.